The procedure takes only a few minutes and is completely guided from the "Cloud Services" tab in your Stoïk Protect platform.
Activate Cloud scan for Microsoft Azure
First, go to https://portal.azure.com/ and log in with your administrator account.
Automatic Method (only if you have an Azure subscription other than Office 365)
Open the Azure console by clicking on the Shell icon at the top of your screen (illustrated in the screenshot below). A terminal should open at the bottom of your screen.

Copy and paste the code below into the console and press Enter:
$stoik = (Get-AzADServicePrincipal -DisplayName "Stoïk Cloud Scanner")
$Subscriptions = Get-AzSubscription
foreach ($sub in $Subscriptions) {
    az role assignment create --assignee $stoik.id --role "acdd72a7-3385-48ef-bd42-f606fba81ae7" --scope /subscriptions/$sub
    az role assignment create --assignee $stoik.id --role "39bc4728-0917-49c7-9d2c-d95423bc2eb4" --scope /subscriptions/$sub
    az role assignment create --assignee $stoik.id --role "73c42c96-874c-492b-b04d-ab87d138a893" --scope /subscriptions/$sub
}

$context=Get-AzContext
Connect-AzureAD -TenantId $context.Tenant.TenantId -AccountId $context.Account.Id
Add-AzureADDirectoryRoleMember -ObjectId $(Get-AzureADDirectoryRole | Where-Object {$_.DisplayName -eq "Global Reader"} | foreach {$_.ObjectId}) -RefObjectId $stoik.id
Add-AzureADDirectoryRoleMember -ObjectId $(Get-AzureADDirectoryRole | Where-Object {$_.DisplayName -eq "Security Reader"} | foreach {$_.ObjectId}) -RefObjectId $stoik.id

$resourceId = $Get-AzureADServicePrincipal -All $true | Where-Object {$_.DisplayName -eq "Microsoft Graph"}
New-AzureADServiceAppRoleAssignment -Id 230c1aed-a721-4c5d-9cb4-a90514e508ef -ResourceId $resourceId -ObjectId $resourceId -PrincipalId $stoik.id
Manual Method (if you only have Azure AD, start at step 8)
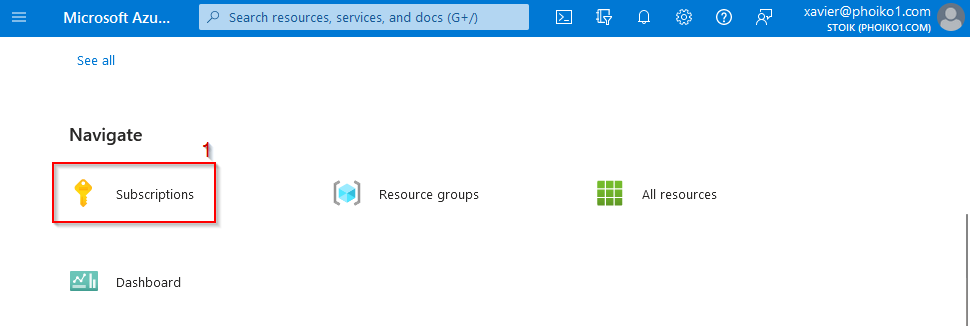
- On the Azure console, click on Subscriptions:

2. Select the subscription you want to analyze by clicking on its name and select Access control (IAM) from the left panel.

3. Click on Add, then Add role assignment.

4. Select the Reader role and click on the Members tab.

5. Click on Select members and search for a member named Stoïk Cloud Scanner. Select it and confirm by clicking on Select.

6. Click twice on Review + assign at the bottom of your screen.

7. Repeat steps 3 to 6 for the Security Reader and Log Analytics Reader roles.
8. Search for Stoïk Cloud Scanner in the top search bar. A result should appear in the Azure Active Directory category as shown below. Select it by clicking on it.

9. Click on Permissions in the left panel and click on Grant admin consent for Stoïk.
10.A new window opens, check that a blue checkmark is next to the STOIK name under the application name and click Accept.

11. Open the left menu by clicking on the three bars at the top left and select Azure Active Directory.

12. In the left menu, select Roles and administrators.

13. Search for the Global Reader role and click on it.

14. Click on Add assignments and search for Stoïk Cloud Scanner. Select it and click Add.
15. Repeat this with the Security Reader.
16. Click on Finish on your Stoïk Protect platform.
Activate Cloud Scan for Amazon Web Service (AWS)
For AWS, everything is managed from the Amazon interface, requiring AWS account administrator privileges. Simply follow the detailed procedure on Stoïk Protect when choosing AWS as the provider.
Restart the Cloud Scan
Stoïk's Cloud Scan audits the insured company's Cloud infrastructure automatically every day.
